Thursday, April 19, 2012

Bees for your Garden


Are you aware that about 75% of all the fruits, nuts, and vegetables we eat in this country need to be pollinated by bees? Unfortunately Colony Collapse Disorder (CCD), is a mysterious disease has caused a large decline in the European honeybee population in recent years, here and in other parts of the world. CCD makes it even more important than ever to support our native bees.

Here are a few tips to attract and feed bees in your own yard/garden.

Make your garden bee-friendly

• Welcome bees by making your garden a safe place for them to feed and nest. If you can, leave some undisturbed areas or piles on your property for ground nesters.
• Bees are sensitive to chemicals, so it is important you give them sources of pesticide-free water and mud. It is best to avoid plants that need regular spraying and dusting. Try to use nothing stronger than insecticidal soap to control pests. If you must use chemicals, apply before dawn or after sunset when bee’s aren’t active, and keep the spray off the flowers.

Plant it and They Will Come

• Growing the bee’s favorite flowering plants is a great way to help them. Remember they are attracted by sight and smell. Attract them by planting masses of easy to spot blooms.
• Some bees are attracted by certain types of flowers in a family or by tiny flowers of herbs. You will help the most bees by planting flowers that bloom from spring to frost.
• Early spring blooming tress and bulbs like crocus provide nourishment to hungry bees when they emerge from winter hibernation. As the weather warms and more flowers open bees get busy harvesting pollen. Remember to plant fall blooming flowers to provide bees plenty to eat all season.

Great Shapes

Certain flower shapes are better for attracting some bees than others.
• Start with flat or open-center flowers like yarrow. Larger bees like these.
• Single daisy shaped blooms are better than doubles, which have pollen that is harder to reach.
• Other bees prefer spires with many flowers on them like foxglove.

Native bees are continuously busy making our gardens/yards more productive. Creating a healthy environment and sharing our garden with them is an easy way to help them in their work.

Some seasonal suggestions

Spring
• Crocus
• Flowering crabapple
• Hellebore

Summer
• Alliums
• Weigela
• Yarrow

Fall
• Aster
• Agastache
• Dahlia

Thursday, April 5, 2012

April Gardening Tips for the South


Spring is well underway in the South. Here are some gardening tips to make the most of the season's cooler days in your yard.

Plant container grown perennials: Remember to prepare your planting area by adding compost to enhance nutrition and improve moisture holding ability. Once planted don't forget to water while plants settle into their new homes.

Choose perennials that will give a strong performance in late summer, when Southern gardens tend to fade. Great selections include salvias.

Scarlet or Texas Sage (Salvia coccinea)
Pineapple Sage (Salvia elegans)
Mealycup Sage (Salvia farinacea):
Mexican Bush Sage
Bedding Sage (Salvia splendens)
Azure Sage (Salvia azurea var. grandiflora)
Cleveland Blue Sage (Salvia clevelandii)
Peruvian Sage (Salvia discolor)
Autumn Sage (Salvia greggii)
Brazilian Blue Sage (Salvia guaranitica)
Salvia 'Indigo Spires'
Silver Sage (also known as silver clary or silver clary sage)
Common sage (Salvia officinalis)

Vegetable gardening

Keep sowing seeds of lettuces and garden greens weekly to ensure a long harvest season. Sow seeds of heat-tolerant greens to extend the harvest window. Give greens afternoon shade for best growth. Some heat tollerent choices include 'Jericho' (romaine), 'Buttercrunch' (butterhead), 'Lolla Rossa' (looseleaf red), 'Black-Seeded Simpson' (looseleaf green), and oakleaf types. Malabar spinach also thrives in summer heat.

Seeds
Continue direct sowing seeds of beans, squash, melons and okra. If cutworms are a problem, put collars around seedlings using recycled household items: canned food tins with bottom lids removed or toil tissue tubes cut in half.

Garden tasks

Azaleas
If needed, prune azaleas immediately after flowering. Make cuts to shape shrubs or remove any damaged branches.

Mulch
Replace mulch around azaleas, camellias, and roses. If you suspected or battled diseases and insects with these crops last season, remove and replace mulch to eliminate any hibernating insects or spores. If disease and insects haven't been an issue, simply replenish the mulch. Refresh mulch on planting beds. If you have pine trees, gather free mulch: pine straw. It looks great around shrubs and on flowerbeds.

Tropical Plants
Move over wintered tropicals outdoors when night temperatures remain above 50F. Tuck tropicals into a shady spot and fertilize with an all-purpose fertilizer to jump-start growth. You can also remove the top inch or two of soil and add a layer of compost to boost growth


It's Time for Tubers
Over wintered caladium tubers emerge this month in the warmest parts of the South. In areas where caladiums are annuals, tuck new or stored tubers into the ground. Plant 2-3 inches deep.
Add cannas to your garden for a striking foliage show. They look great with under-plantings of asparagus fern or sweet potato vine.

Lawn care
Grass is growing in earnest now. Time mowings so you're removing only one-third of total blade growth. Follow this guide to mowing height.
Zoysia: 1/2 inch
Bermudagrass: 1/2 inch
St. Augustinegrass: 2 inches
Tall fescue: 2-1/2 inches
Sharpen your mower blade frequently. A sharp blade makes clean cuts, while a dull one tears grass blades. A torn blade provides an entry point for disease.


Thursday, March 22, 2012

6 tips for Starting a Wildlife Garden


Now is a great time to start planning your garden and making additions. While you are in the planning stage consider starting a wildlife garden. Have you wanted to see more birds and butterflies in your yard year-round but don’t want to spend a lot of cash? Here are some tips on how to get started with out breaking the bank.

I developed my wildlife habitat over many years having to start with a nearly blank slate. Only 2 pine trees, one spindly oak tree were left by the builder and a large area of newly planted grass. Not much in the way of food, water or shelter for birds, butterflies or other wildlife in the yard. I started planting trees and shrubs adding feeders and nesting boxes all at once when I moved in but you can start on a smaller scale for a lot less money.

1. If your not sure this type of gardening is for you start small by planting a container garden filled with nectar-rich plants like lantana, floss flower and fuchsia. Then later you can add plants to your landscape on a larger scale.
2. Birds are attracted to water so build a small size pond using a whiskey barrel or something of similar size. If you can add a bubbler or something else to make movement in the water you will attract more birds. To use as a bird bath you will need to have a shallow area for the birds and a place for them to perch.
3. As you add to your landscape take advantage of late-season sales to acquire perennials, trees and shrubs as a discount price in the fall. Buy and plant wildlife favorites in the fall and you will be able to attract more birds and butterflies for next year.
4. Try and rescue native plants from local construction sites when you see them. Ask the developers if you can remove them before they are bulldozed. They are often happy to oblige. We had a house in Georgia that had plants rescued from a neighboring lot under construction.
5. Avoid insecticides whenever possible. This will allow beneficial insects to your backyard. You may suffer a little more damage in your garden but its worth it when you consider many birds like wrens, bluebirds and robins look at bugs as their favorite food.
6. Save money by not buying seed. Plant your landscape with seed- and berry- bearing plants like sunflowers, viburnums, coneflowers, zinnias, black-eyed Susan’s, blueberries and Cosmos.

Try one or all of these tips and in no time you will be attracting more birds, butterflies and other wildlife to your yard or garden.

Friday, March 2, 2012

Weed Prevention

Weed prevention

It’s that time of year again….time to think about controlling weeds before they take hold of your lawn or garden. I’ve been so busy that I didn’t get my pre-emergence down as early as I like but late is better than never! If you live further north you still have time to apply your pre-emergent for the best control. Preventing weeds before they make an appearance is the best idea to control weeds. Let’s review the types of weed control.
Herbicides
Chemicals that prevent or kill existing weeds are known as herbicides. While all herbicides control weeds, the key is to know which one is most efficient for your weed problem. First it’s important to properly identify the weed you wish to do away with and understand its growth cycle. This will enable you to choose the proper herbicide product and correctly time its application to achieve best weed control.
Herbicide products can be classified several ways. One is by their activity - selective or non-selective. Generally most herbicides are selective, meaning they will only control specific weed species without damage to nearby grasses and ornamentals. When controlling weeds in lawns, it is also important to know your variety of turf grass, since their tolerance to herbicides does vary.
Non-selective herbicides will kill or damage all vegetation, so it is important to apply them precisely to avoid injuring desirable plants and grasses. These are commonly used in landscaping for lawn renovation and for controlling weeds and brush along highways.

Pre-emergence herbicides
Another classification for herbicides is based on the time they are applied in the weed's life cycle. Pre-emergence herbicides are most effective when applied a few weeks prior to the germination and emergence of weed seeds. They will not control established weeds. These herbicides create a weed control zone on the soil surface, preventing seeds from germinating. Because most pre-emergents have a long residual, they are not recommended for newly seeded turf grass. Annual weeds such as crabgrass, annual bluegrass and goose grass are normally controlled by pre-emergence herbicides.

Post-emergence herbicides
Post-emergence herbicides are applied after the weed is established and actively growing. While a some products work through soil application, most of post-emergents work on contact. They are absorbed through the surface of leaves and translocated throughout the plant. It is recommended that applications be made during a dry, eight-hour period, since rain can wash off the material and lessen control. Most broadleaf weeds are controlled by post-emergent herbicides.
Remember before you buy and apply any herbicide, carefully read the entire label for exact weed species controlled and places where it can be safely used. It is important to review precautionary information and restrictions, follow directions for use, and store and dispose of empty containers as indicated on the label. Unfortunately some people feel that is a little product is good, a lot will be even better. This is not true and can be very harmful to you, your lawn and the environment.
If you don’t want to use any chemicals you can always pull or hoe your weeds. When using this method remember to start early to stay ahead of the weeds!


Monday, February 27, 2012

Composting Styles

Do you have a composting style? I know I’ve written about composting before but there is a reason I’m writing about it again. There is a reason gardener’s call compost “black
gold”. This broken-down organic material can improve any type of soil. You
can add it so sandy soil to add nutrients and moisture-holding capacity
and is capable of loosing clay soil allowing it to drain better. Plants
just grow better when compost is added to any soil.

Even knowing this many of you don’t compost thinking it is too
complicated; too easy to do something wrong messing up the process. But
any one can compost and it can be a really easy process. My first attempt was just a pile of leaves and grass clipping and occasionally I added egg shells, tea leaves and coffee
grounds. Or make it a little more complicated by using a three-bin system that produces compost faster but takes more time and effort. Either way you end up with compost. Let’s go over some of the time and equipment involved in composting and see what style
might suit you.

Easy- a simple compost pile works great if you have the space and the
time. It’s a great way to deal with fall leaves--just mower the leaves to
chop them up is you want them to compost faster. This is an example of
cool composting. * More about this later.
Fenced- Sometimes a little containment is in order especially if you
have a lot of leaves that might be subject to blowing around. There is no
right or wrong way to build your bin. Look for some thing you can use
around your garage or shed. Try making a round container with fence posts
and hardware cloth. Other ideas are an old barrel with holes drilled in
the bottom or pieces of picket fence or old pallets fastened into a box. A
pile can be turned for hot composting but will also work for cool
composting.
“Feeding” the Pile- Food scrapes make good compost. I collect
vegetables, fruit, coffee grounds, tea leaves and egg shells but never use
meat, fats or oil. To prevent odor it is important to bury the scrapes (or
locate your bin where odor won’t bother you). A lid will keep rodents and
other pests away. Leave alone cool composting or turn for hot composting.
Ready-made Tumbler-ready-made compost tumblers are enclosed so it is
safe to use food scrapes. Their design allows for easy turning either by
using a stand or they are shaped so you can roll them around the yard to
turn the compost. These are best used for hot compost as they are usually
are rather compact and don’t hold a lot of material. The designs make them
easy to turn speeding up the compost process producing finished compost in
weeks instead of months.
Three Turns to the Right- To make a lot of compost quickly try using the
3-bin style. You can purchase this style ready-made or build one out of
slats or pallets. The bins should be able to hold 1-cubic yard (3 X 3 X 1
feet) –this seems to be the magic number for efficient composting. Fill
the first bin with layers of green and brown materials. When the volume
has reduced by half, turn it in to the second bin and refilling the first
bin. When the volume of the second bin is also reduced to half turn it
into the 3rd bin. In a few months you will have a small pile of finished
compost in the 3rd bin, and this will allow you to keep up a continuous
process of composting. Finished compost in the 3rd bin should be rich,
dark and crumbly and should have a pleasant earthy smell instead of a
strong odor.

So now that you have an idea of the different ways of composting…have you
found your compost style? Maybe a combined style is for you with a simple
pile hidden in the back of the yard and a ready-made compost tumbler for
your kitchen garden. If you make a lot of compost or just a little to top
dress a planting bed or two each spring, your plants will be happy and a
happy plant it a good plant.
*Cool or Hot Compost?


Cool composting
• Add grass or leaves as you go
• No turning needed
• Brown to green ratio doesn’t matter
• Finished in 6-months or 2-years

Hot Composting
• Build all at once with 3-parts brown to 1-part green
• Turn it often and keep it moist
• Kills most weed seeds and pathogens
• Finished in 2 to 6 months

Brown Materials
• Straw
• Dead leaves
• Cardboard/paper
• Pine needles
• Sawdust

Green Materials
• Grass clippings
• Fruit of vegetable scraps
• Coffee grounds
• Egg Shells
• Fresh manure (not from pets or humans)
• Healthy green plant material


Monday, February 13, 2012

Spring Money-Saving Strategies

When your spring bulbs first emerge, it's a good reminder to get started planning your Summer Garden. If you plan now, you can save a lot of money within a couple of short months! Here are a few ideas to get you started:

• Sow some seeds- Instead of buying zinnias and other annuals, grow your own from seed instead. Check out the seed area at your local nursery to see all the varieties you can grow.
• Make a list-It's easy to spend a lot of money on things your don't need at the garden center. Do an inventory, make a list and then stick to it!
• Get ready to share-Solicit a few garden friends to help your buy plants in bulk. You'll get a better price, and then you can divvy them as needed.
• Divide and conquer-You'll conquer big savings just by dividing the plants in your own garden. Spring is a great time to split perennials.
• Participate in plant exchanges and trade plants with friends.
• Shop local nurseries or home centers and watch for good values especially clearances!
• Attend local garden walks or consult a Master Gardener to learn about plants that grow well in your area.
• Check on-line classified sources to find homeowners who want to get rid of existing plantings.
• Start annuals, perennials and vegetables from seed.
• Save cold-tender bulbs to plant in next year's garden.
• Overwinter Boston ferns and banana plants inside so you can use the following season.
• Use large plants, such as shrubs and trees, to fill out garden space.
• Use salvaged bricks, lumber and alley-picked finds like furniture or old windows for garden decorations and hardscape.


Friday, February 3, 2012

Getting Fit in the Garden

How many of you made a New Years resolution to "Get in Shape" in 2012? With all the holiday foods most of us gain a few pounds and resolve to lose then and often to get fit at the same time. Unfortunately like many of you I try to squeeze way too much into one day. In order to accomplish my to do list I look for ways to multi-task wherever possible. With gardening I can combine an activity I love like gardening with one that often ends up on the back burner like exercise.

Here are a few ideas for helping you burn calories and build your health and well-being while taking care of your landscape.

Get off on the right foot-Prepare for the gardening workout the same way you would for a gym session.
• Drink plenty of water stretch before you start digging, raking, pruning, planting or other fall garden activities. Maintain proper posture to help avoid injury. Keep movements close to your body and hands in a neutral position to avoid strain caused by repetitive movements. Look for ergonomic tools that properly position our bodies and increase our reach and strength.
• Bring on the Burn- Now we're ready to start burning calories. Seeding the lawn or bare spots can burn up to 155 calories, planting bulbs, annuals and perennials can burn as much as 260 calories per hour. Bigger plants like trees and shrubs need more muscle power and can burn up to 295 calories and hour when planting. Watering the seeds, blubs and plants can burn 260 calories per hour. Raking not only burns 260 calories per hours but also works the muscles of the upper body. Mowing the lawn can burn 140 calories per acre on a riding lawnmower, 250 per 1/3 acre with a power mower, and 340 calories per 1/3 acre when using a push reel mower.
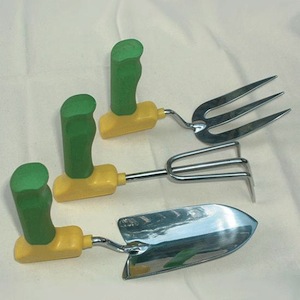
• Tools that Tone-Don't let arthritis, bad knees or back problems keep you out of the garden. Look for adaptive tools and equipment. Along with special tools consider making raised beds, using containers and vertical wall gardens as part of your landscape. These options positions the garden with in easy reach, allowing you to keep moving and gardening! No matter your age, ability or fitness level, you might want to ask a friend to join you. (Next time work in your friends garden.) It can make your gardening workout less overwhelming and a lot more fun. When you are finished, cool down, relax and enjoy the beauty of the garden.


Tuesday, January 24, 2012

Tips for January


Now that I'm finished with visitors at Thanksgiving and Christmas, an after Christmas trip to Florida and a bout of illness I'm ready to get back to gardening and my blog. It has been such a warm winter here that it was well into December before many of my summer volunteer flowers died. When we drove up to our house after our trip to Florida I saw that some of my tulips had started to bloom! Many of the plants that should still be dormant are already showing signs of coming back. I'm wondering if this warm weather will continue to fool my plants making them comeback before what is usual for them. Of course southern gardeners always worry a late frost or freeze will damage early spring blooming plants and that may be more likely this year.Right now Tulips, Loropetalum, Osmanthus fragrans, Verbena, & Pansies are all blooming in my yard I discovered some leaf lettuce in one of my pansy pots!

Here are some things you can do this month:


• Clear a space for starting seed is indoors and do an inventory of what you'll need. A table or shelf with an adjustable light fixture above is a good setup for most of us. Now is a good time to shop for supplies like flats, seed-starting mix, containers and labels.
• Keep holiday plants looking their best by removing any decorative foil. Punch holes in the bottom for proper drainage if there is no hole in the pot.
• Add a bit of color to your indoor garden by placing silk blooms, colorful dried materials or cut flowers in a water pick among your household plants.
• Start a windowsill herb and greens garden. You can grow parsley, basil, marjoram, mint, rosemary and oregano as well as leaf lettuce, spinach and other greens indoor.
• Keep the beauty of your garden alive year-round. Enlarge and frame your favorite garden photos.
• If you have a Garden Journal check your notes/photos on last years garden and narrow down the list as shop garden catalogs arriving mail by now. If you don't have a Garden Journal consider starting one this month.


Tuesday, December 6, 2011

Ssssh... Garden is sleeping?


Wow it has been a month since I last posted...where did the time go? Well my garden is usually sleeping this time of year but the 70+ degree temperatures this fall has kept things blooming well past their normal season delaying some of my garden clean-up. I just can't cut back a plant that is still blooming so the final clean-up will have to wait until a freeze.

December's days are short, and the nights are long as winter arrives here December 22nd, the shortest day of the year. Hopefully you can chalk up another successful year of gardening and take a break from gardening chores. Most gardening activities this month will take the form of decorating touches in the front yard for the festive holiday season. I'll collect sprigs of Holly, Magnolia, evergreens and berries from the yard for indoor decorating and package decorations. I also decide which of my Christmas cactus started last year is ready for gift giving this year to family and friends.

Here is my December check list:

Perennials: Divide and replant perennials'
Tubers: Check dahlias and begonia tubers and glad corms and remove diseased ones.
Annuals: Start ordering flower seeds
Vegetables, Fruit & herbs: Plant fruit trees and bushes
Mulch herb bushes against cold
Ventilate greenhouse in mild weather
Bulbs: still not too late to plant daffodils, tulips and lily bulbs
Trees & Shrubs: Continue to plant new trees and shrubs on good weather days.
Lightly prune holly and evergreens using cuttings for wreaths and decorations
Lawns: Keep lawn free of leaves.
Avoid walking on frozen or over-wet grass

Tuesday, November 8, 2011

Fall Clean-up & Recycling Garden Planters November 8th , 2011

It has been a really busy time in my garden as I continue to pull out fading summer annuals and cut back perennial that have finished blooming. But of course I also found more deals on plants at Lowe’s last week and spent most of one day finding places for them. This included relocating several shrubs, 5 in all. The rule of my yard seems to be that plants are not in the correct location unless I have moved them at least once! While I was finding places for new perennials and a Limelight Hydrangea I also noticed that some of my large garden planters were looking a bit sad. So I decided instead of replacing them I decided to paint them instead. They turned out pretty well and from a distance they look really good. So I think they will make it another year. Using spray paint made things pretty easy and they were ready to plant the following day! Jim put the pre-emergent down a little later than I would have liked but better late than never when it come to preventing weeds! I hope you are taking advantage of this great Fall weather to do a ‘Fall Clean-up’ in your garden/yard.