The Creation of my backyard habitat for wildlife and our enjoyment and how it has grown and changed since 2004.
Tuesday, January 29, 2013
My Lawn Isn't Thriving
The first few year we lived in our Charleston, SC house both my backyard and front yard both did pretty well. Since Centipede grass doesn't like to be fussed over I just check the PH every couple of years and applied 15-0-15 lightly as suggested by my soil report from Clemson Extension. Then about 3 years ago the front yard began to thin and just didn't recover from winter as quickly as before.
I know from planting trees when we first moved into our home that the front yard was mostly clay. I've amended my flowerbeds over the years and the plant there do rather well. I wondered what I could do without digging up the lawn and starting over. I asked several Master Gardeners and Extension Agents for some ideas and came up with a plan.
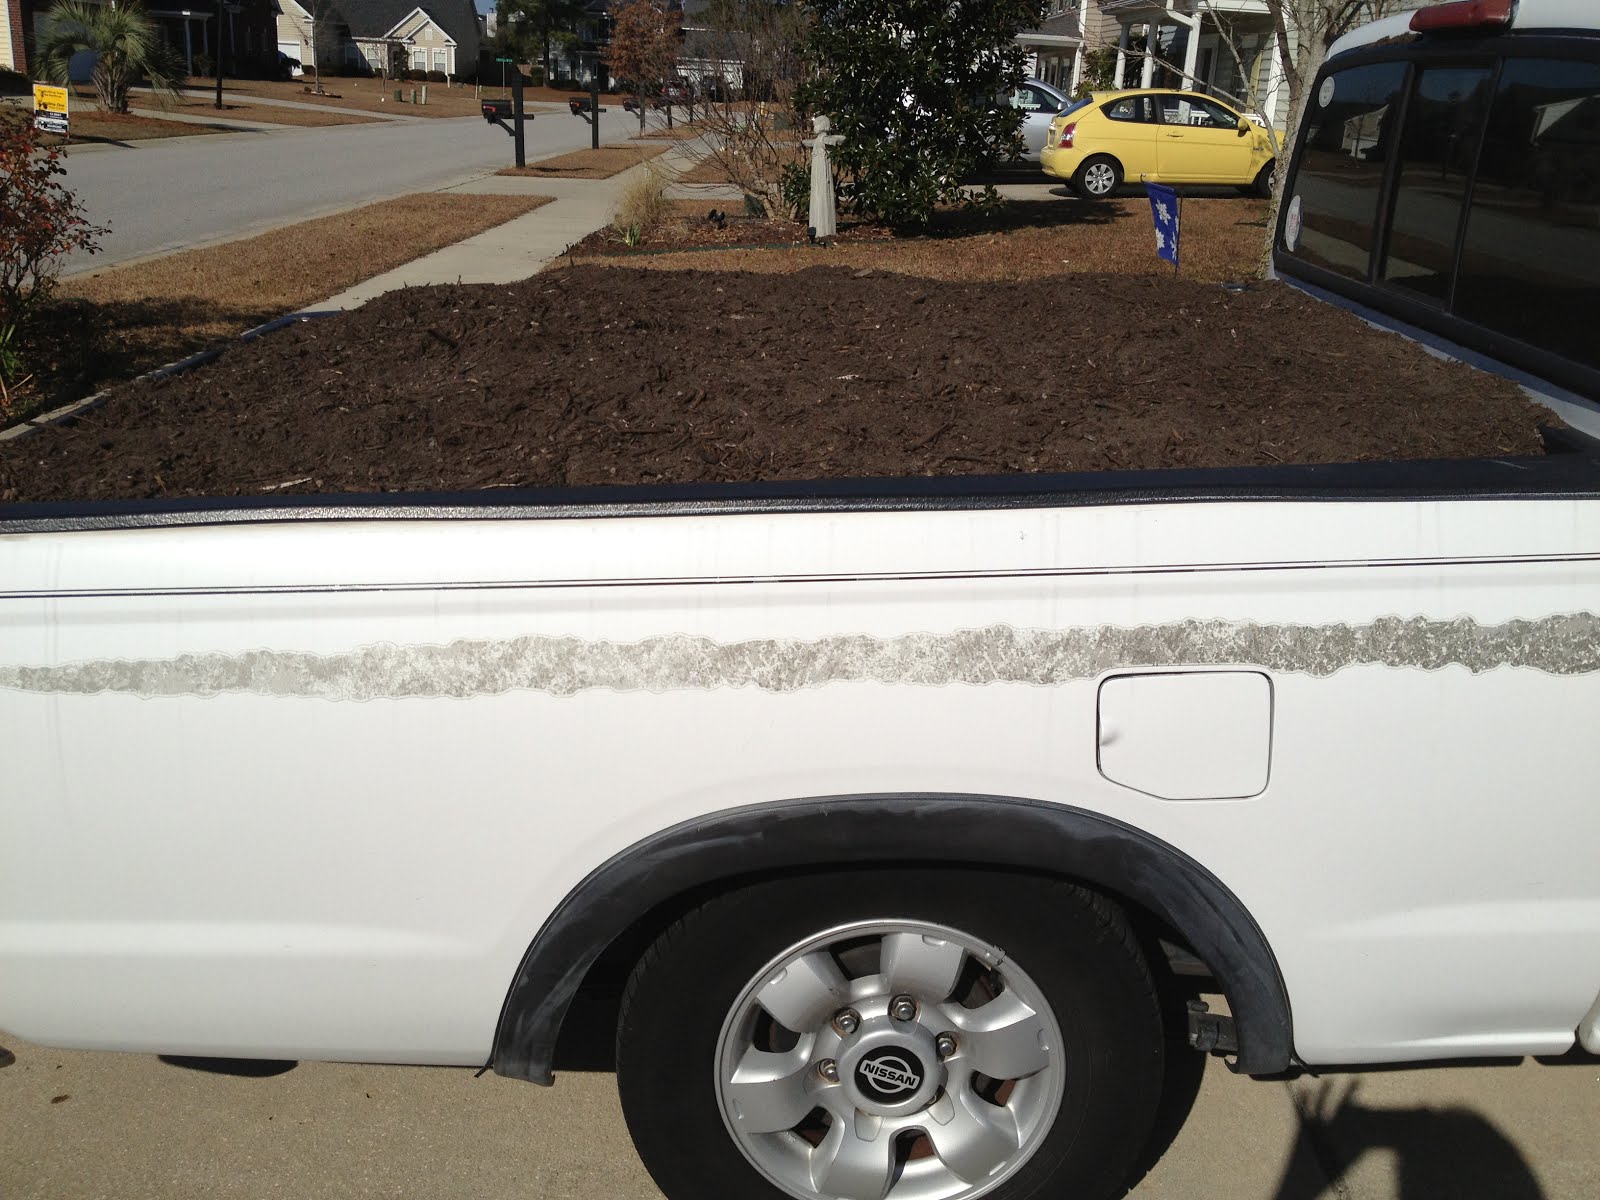
While my warm-season lawn was dormant I spread a light layer of compost over the yard. This was purchased at a local landfill that also runs a compost facility for $10 a ton. Our truck couldn't quite hold a full ton so it cost us only $7 and we were able to coat the front lawn with a little leftover for my other garden projects.
I've been watering the compost it in on warm days this winter and hope to see my yard respond with healthier turf. When the grass is fully out of dormancy which is usually around the end of May we plan to aerate the lawn and add more compost. It may take a little time but I'm assured that this will help my Centipede lawn. Check back with me in a few months for an update and we'll see how it works out!
This should work for other types of grass as well. Just remember not to bury your turf too deep in the compost. A thin layer will work best.
Wednesday, January 16, 2013
Stinkhorns Fungus
Have you ever walked outside in your yard and said “Pee-yew”? What is that smell? Well I have, and this winter has been a very smelly! During the cooler weather of winter and early spring you may notice foul-smelling mushrooms popping up in your yard like I have. The odor from stinkhorns ( Clathrus columnatus) with it’s weird orange fruiting body is so strong it may make some people gag. Although the smell is extremely unappealing these fungi; known as stinkhorns, are not really bad for your landscape and can be beneficial.
Stinkhorns fungi start out as white, egg-like structures in mulch or other damp decomposing material. Most of this fungal structure is found underground. When enough water is available, the egg-sac structure will rupture and the mature mushroom will emerge. Stinkhorns are in the same order of fungi that includes puffballs and earthstars. Depending on the type of stinkhorn the mushroom can be stalk-like, globular, or latticed and very in color usually pink or orange in this area.
All Stinkhorns produce foul order as the name implies. Sometimes described as a putrid, rotting meat smell, this smell attracts ants and flies that pick up and carry the mushroom spores to other places. The good news is they will not harm plants or grasses in your landscape. In fact stinkhorns break down organic matter and can be beneficial to sandy, clay and nutrient poor soil. By breaking down materials like mulch the nutrients become available for plants.
As for management, take heart that these mushrooms are seasonal and stinkhorns also shrivels and disappear quickly. They will normally appear for just a few weeks once or twice a year especially during wet, cool weather. Stinkhorns do occur naturally in the landscape but can also be introduce through mulch materials. If you can’t abide the stinkhorns even with their beneficial attributes there are a few steps you can take to deal with them in your own yard:
• Remove decaying organic matter, especially around dead roots, underground stumps and hardwood chip piles
• Think about using vegetative ground covers instead of mulch and/or keep large mulched areas away from your house
• Dig or hand pick stinkhorns in the ‘egg’ stage put it in a zip lock bag and throw away
• Best suggestion is to tolerate them. Remember they are a benefit to your soil. Close your windows to keep smell out of the house and try holding your breath while walking by the stinkhorn.
There is no registered safe chemical control for use on stinkhorn fungus. Using chemicals is not recommended.
I've had all of the types in my yard in the past but this year mine have all been octopus stinkhorns.
Stinkhorns fungi start out as white, egg-like structures in mulch or other damp decomposing material. Most of this fungal structure is found underground. When enough water is available, the egg-sac structure will rupture and the mature mushroom will emerge. Stinkhorns are in the same order of fungi that includes puffballs and earthstars. Depending on the type of stinkhorn the mushroom can be stalk-like, globular, or latticed and very in color usually pink or orange in this area.
All Stinkhorns produce foul order as the name implies. Sometimes described as a putrid, rotting meat smell, this smell attracts ants and flies that pick up and carry the mushroom spores to other places. The good news is they will not harm plants or grasses in your landscape. In fact stinkhorns break down organic matter and can be beneficial to sandy, clay and nutrient poor soil. By breaking down materials like mulch the nutrients become available for plants.
As for management, take heart that these mushrooms are seasonal and stinkhorns also shrivels and disappear quickly. They will normally appear for just a few weeks once or twice a year especially during wet, cool weather. Stinkhorns do occur naturally in the landscape but can also be introduce through mulch materials. If you can’t abide the stinkhorns even with their beneficial attributes there are a few steps you can take to deal with them in your own yard:
• Remove decaying organic matter, especially around dead roots, underground stumps and hardwood chip piles
• Think about using vegetative ground covers instead of mulch and/or keep large mulched areas away from your house
• Dig or hand pick stinkhorns in the ‘egg’ stage put it in a zip lock bag and throw away
• Best suggestion is to tolerate them. Remember they are a benefit to your soil. Close your windows to keep smell out of the house and try holding your breath while walking by the stinkhorn.
There is no registered safe chemical control for use on stinkhorn fungus. Using chemicals is not recommended.
I've had all of the types in my yard in the past but this year mine have all been octopus stinkhorns.
Friday, January 11, 2013
How to Care for Christmas Flowers Year-round Part 3
Christmas Cactus: There are several plant species that are called Christmas cacti, but the true Christmas cactus is the plant, Schlumbergera x buckleyi, a hybrid of some very similar holiday cacti, and is a very common plant in cultivation. These are relatively easy plants to take care of, safe (no spines or toxins) and can live a long time (generations). I have a cutting of one that originally belonged to my husbands grandfather that was very old and very large. I also have the closely related plants Thanksgiving Cactus (due to the timing of the plant’s affinity to bloom around Thanksgiving), and Easter cacti. These plants are nearly identical to Christmas cacti but tend to either have sharper node tips, or much blunter node tips and bloom at different times of the year.
Schlumbergeras are epiphytes in nature (grow on other plants or non-soil surfaces), from the high elevation jungles of Brazil. Their natural environment is a relatively cool even temperature, high humidity, bright light with little direct sunlight, and frequent rain.Considering this it is a little amazing how well they thrive as potted plants in normal cactus soil and in a warm temperate climate, or indoors.Though these are indeed true cacti, they do not look like the cacti most are normally used to seeing. These plants are fleshy, green, segmented plants that, over time, develop woody, thick stems. Thankfully they are basically spineless.
Care:
It's no surprise that, Christmas cacti require different care than do most cacti. Even though they come from tropics, they live in a relatively cool environment and therefore do NOT like high heat like desert cacti do. Basically all cacti are summer growers and spend winter very inactive in terms of growing or flowering. This is true of Christmas cacti as well. Despite their blooming in winter, they do very little growing in winter, but it is still the best time of year to enjoy Christmas cacti. They don’t like temps much over 80 degrees anyway. On the other hand they cannot tolerate freezes either, and prefer temps above 55 degrees. Outdoor plants seem to cope with temps into the low 30's but are not happy about them. Leaves change color due to cold. So if you keep them outdoors and cold weather is coming, bring them in.
And unlike most cacti, Schlumbergeras do not like full sun, particularly when it’s hot. But they do like bright light and grow and flower best if the light is very bright. They will tolerate low light situations for short periods of time, and that is why they do so well as indoor plants. A few days in the middle of the table far from windows will not do them much harm. But they do need to be returned to an area of bright light soon after, or blooming might cease early. My cacti do best when kept outdoors under a shady tree or porch when it’s warm and I move them back indoors near a bright window as it gets colder around 55 degrees. In warmer climates these can be kept outdoors year round, but still don’t try to grow them in the garden like one would a regular cactus. Freezes will damage them, but it takes a pretty severe freeze to kill one in a warm climate.
Schlumbergeras need to be planted in well draining soil. Remember in the wild they basically live in soil-less situations, so water needs to drain past the roots easily, or they could rot. Under-watering will kill a Christmas Cactus, too, but a lot more slowly. There is time to intervene should the cladodes appear flattened and wrinkled. Schlumbergeras are from high rainfall and high humidity environments and do appreciate being watered regularly. My plants seem to do well in soil formulated for cactus.
Once the days shorten (usually in October), back off on watering. Some recommend NO water the entire month of October, and then resume again in November. Then it is recommended to withhold water again once blooming is over for a bit longer than a month this time. If signs of new growth appear, it’s time to start watering again. This is also a good time to re-pot the plant and put it in some new, clean, well draining soil. Re-potting is recommended every few years.
Fertilization should be with half strength water soluble formulas and only in warmer weather. Wait until new growth is seen and time for re-potting. If using a granular fertilizer, it is best to be stingy- these plants do tolerate fertilizers better than do most cacti, but still, be careful. 10-10-10 is the best ratio to use.
For plants that are not flowering as expected:
Be sure the soil is not too dry, or plants are not next to a cold or hot source (air conditioner, heater etc.). If there is some night light on the plant, it might retard it from blooming. Put these plants in a totally dark room for a minimum of 13 hours a night. This will also help these plants bloom when wanted, and not too early. These plants may need longer light to simulate early fall, rather than late fall, to keep them from blooming too early. Then do the total darkness thing about 4-6 weeks before the time blooming is desired, every night until buds form and the plants can be returned to their location near the window or table. And be sure the daytime temps are in the 60's (hot houses will prevent these from blooming) and night temps are not much below 50 degrees. Sometimes a little liquid fertilizer with extra potassium can help stimulate blooming. Once flowering starts, it is recommended not to move these plants too much, in terms of overall heat and light, or they may abruptly stop blooming and drop all their buds.
Thursday, January 10, 2013
How to Keep Christmas Flowers Blooming Year-round Part 2
Paperwhite narcissus flowers are tall plants that produce papery-thin white flower blossoms. The plants grow from a bulb rather than seed and bloom in the early spring months. Because the plant grows so easily with nothing more than water and air, they are also grown indoors during the winter season. While many people discard the paperwhite bulbs once they stop blooming, you can store them until spring when they can be replanted outdoors.
1. Allow the potted blooming paperwhites to cool off at night in a sheltered area where temperatures don't fall below about 45 degrees F. Blooms may continue for up to three weeks in mid-winter.
2. Keep the potted paperwhites in a warm, light location around the clock after the flowers fall off. Water the paperwhites regularly with a little bulb fertilizer while the leaves are still green.
3. Stop watering the plant in early spring when the leaves begin to turn yellow and brown. Clip off the leaves when they are completely dry.
4. Keep the bulbs in the planting pot during their dormancy. Store the pot in a warm, dry place.
5. Observe your paperwhite plant beginning in October. Green shoots should start emerging in late fall. Keep the paperwhites indoors for the second year.
6. Plant paperwhite bulbs in the garden after the second round of blooming and drying. Wait for the bulbs to go dormant in early to mid-spring. Plant them deeply in regular garden soil amended with a tablespoon of bone meal.
7. Mulch your paperwhites with a cover of crushed leaves or other mulch. This will help keep them from freezing. Paperwhite bulbs are not hardy and will die in freezing temperatures.
In the Lowcountry Paperwhites will usually come back
unless we have a very cold, hard winter.
I have also planted mine in the garden the first spring.
Wednesday, January 9, 2013
How to Keep Christmas Flowers Growing Year-Round
Part 1
Poinsettias, Paperwhites, Amaryllis & even Christmas Cactus are a beautiful addition to Christmas decorations. Sadly, they are treated as cut or silk flowers by many people and tossed out when the ornaments are put away at the end of the holiday season. However, this doesn't have to happen. With forethought in selection, proper care during the holiday season and afterward, all these plants can be successfully planted and grown for long-term enjoyment. This post I'll tell you how to preserve your Poinsettia. Check soon for information on how to keep the other Christmas flowers growing.
Poinsettias- during the holiday season:
Start by buying a healthy plant:
A healthy poinsettia makes replanting easier. A poinsettia with dense foliage all the way to the soil is a sign of a healthy plant. Buy a poinsettia with stiff stems and does not have any wilting, breaking or drooping. Avoid plants that come in sleeves made of plastic, paper or mesh or ones that are crowded on the store shelves; this reduces air flow, which a poinsettia needs. Check the soil and do not buy a plant whose soil is waterlogged, as this can cause root rot. Despite the fact that poinsettias are holiday plants, they originate in Mexico. Protect them from cold winds or temperatures below 50 degrees; cover them with a large, roomy shopping bag when transporting them from the store.
During the Holidays:
1.Do not place it in direct sunlight or block the sunlight with curtains or shades. Keep the temperature in the room between 68 and 70 degrees and do not put the plant near drafty doors, heating and air conditioning ducts or fireplaces. Set the poinsettia in the sink or tub when watering so the water will drain completely; never leave standing water in the poinsettia’s container or saucer.
2.Remove the wilted bracts and leaves from the poinsettia. Continue to monitor the light, heat and water for the plant. Cut the poinsettia down to 8 inches tall in late March or early April and apply a balanced all-purpose fertilizer. You should see new growth beginning in May.
When the weather is warmer:
3.Move the poinsettias outdoors when all danger of frost has passed and the night temperatures are above 50 degrees. Place them in indirect light. After late May, move it to a larger pot that has a good mix of peat moss or organic matter in the soil. Continue proper watering and apply a light balanced fertilizer every 2 to 3 weeks. Prune the poinsettia, beginning in late June or early July, to keep it compact; stop pruning at the end of August.
In the Fall
4.Bring the poinsettia back inside when temperatures drop below 50 degrees. Continue to monitor the plants' water and light exposure; extended exposure to even a table lamp could delay the blooming. Make sure the temperature around the poinsettias remains 60 to 70 degrees; anything outside of this can affect the bloom time. It will begin to grow leaves and set buds in the fall and bloom during November and December.
5.Keep the poinsettia in 14 continuous hours of darkness each night after late September. Move it to a totally dark room--such as a closet--or cover it with a box that is large enough so as to not crowd the plant. Continue the regular watering and fertilizing during the holiday season.
If you happen to live in a tropical climate: you can plant your Poinsettia outdoors.
1.Keep the plant dry throughout the winter months, watering sparingly. Do not fertilize the plant at this time.
2.When the weather warms up to a steady 55 to 60 degrees Fahrenheit, cut off any faded leaves, leaving behind spiky stems.
Place the potted poinsettia outdoors so that it can get used to the outdoor weather. Leave it outdoors in a pot for two to three weeks, as this allows it to acclimatize to both the light and the temperature.
4.Select a site where the poinsettia will receive full sun for most of the day but no light at all during the night. Avoid areas that are illuminated by street lights.
5.Dig a hole in the garden bed for the poinsettia that allows it to sit at the same level in the ground as it did in the pot.
Place the poinsettia into the ground and firm the soil around its base.
7.Apply a 2-inch-thick layer of mulch around the base of the poinsettia to help it retain water.
8.Water thoroughly.
9.Fertilize monthly with an 18-16-12 fertilizer, which contains 18 percent nitrogen, 16 percent phosphorus and 12 percent potassium. Use 2 lbs. per 100 square feet.
When I lived in Florida I was able to keep a flowerbed of poinsettia's alive for several years in a protected spot in my yard.
Tuesday, November 13, 2012
Fall Clean-up in the garden
The last week I've been concentrating on Fall clean up in the garden. It is kind of sad pulling up dead and dying annual flowers, removing the moon flower vine from the arbor, and cutting back an overgrown vine. Fall garden chores also included relocating my limelight hydrangea, and planting 3 azaleas purchased earlier this year. I also started a new compost pile in one of my 2 compost bins.
There are many pretty colors provided by the maples, blueberries, crape myrtles, dogwoods and Virginia Sweetspire as I work in the garden. When the leaves fall they need raking, unless like me you put down a pre-emergent. Raking can break the weed-shield provided by the pre-emergent. My husband mulched and bagged the leaves so I could add them to the compost pile I started. In a compost pile, the natural process of decomposition is sped up and you are left with a rich form of organic matter for your flower bed or vegetable patch. Compost also helps soil retain water.
In fact, autumn is a great time to make compost since there is a good mix of leaves, some spent plants and grass clippings. This means you will have a combination of carbon (leaves and other “brown” material) and nitrogen (grass clippings and other “green” material), which produces compost quickly. Keep the pile moist and turn it often, and you will have compost to use in your garden come spring. Or just leave it alone to decompose slowly.Don't compost any diseased plant material.
Some of my garden clean up will go on a brush pile. It will provide winter quarters for lizards, frogs, toads and small mammals such as chipmunks and rabbits, as well as bumblebees and other native bees. The leaves and other dead vegetation are like a “down comforter” for winter wildlife. You can Start your own brush pile with a layer of loosely stacked or crisscrossed branches, and add stalks and leaves on top.
When autumn approaches, I stop removing some spent flowers and let them to go to seed and only remove diseased plant parts and leave the rest standing in some areas of the garden. I don't like the sight of brown stems but like to leave some of them as cozy winter nests for wildlife. Lady beetles, butterflies and other insects will bed down among the stalks during the cold season. Siskins and other birds will dine on the seeds of sunflowers, cone flowers, grasses and other plants.
Using these clean up ideas will not only produce less of the waste clogging up landfills, you also will protect your plants and enrich your soil, while providing a winter welcome mat for wildlife.
Wednesday, October 17, 2012
PASS-ALONG PLANTS: a Southern gardening heritage
One of the great pleasures of gardening is sharing information with family members, friends,and neighbors. But perhaps the best benefit of sharing with other gardeners is receiving and giving pass-along plants.
Sharing plants is an especially strong tradition in the South. Pass-along plants are easily propagated, often unavailable at a retail nursery, and "passed along" to other gardening friends. Each holds a story of where it came from and the loving hands that grew it whether you trade with your next door neighbor or attend an organized plant swap. I have pass-along plants that were given to me when I lived in Florida that traveled to Georgia and now reside in my South Carolina yard! I feel close to the giver whenever I see them in my yard. I have also passed along plants to my friends in all 3 states and hope they have the same good memories.
Many old varieties, such as Confederate rose and heirloom vegetables, are available only as pass-along plants from other gardeners, who have often cultivated them for generations. A pass-along plant is defined as one that can be easily propagated and given away. But when and how does one acquire them?
Fall is a good time for acquiring pass-along plants, with divisions, seeds and cuttings as the usual methods of propagation. Here are some tips for each.
Divisions: the rule of thumb in plant divisions is that the plant should be divided opposite the season when it blooms.
Thus, those plants that bloom in spring and summer can be divided now. Some examples alliums, cannas, ox-eye daisies, coreopsis, crinums, crocosmia, dianthus, gladiolas, daylilies, iris, and phlox.
Seeds: seeds can be collected and saved for spring planting or for starting early indoors or in a greenhouse. There should be many seeds available for such old favorites as coral vine, cypress vine, cardinal climber, hyacinth bean,
butterfly weed, yarrow, coreopsis, purple coneflower, gaillardia, gaura, salvias, and many others.
Cuttings: for plants that aren't winter hardy, you can make cuttings to carry over indoors or in a greenhouse,
for setting out next spring.
Here are our some popular plants to hand down from generation to generation.
Keep your eyes open for pass-along opportunities so you can participate in the enjoyable activity of sharing what you have with others and having others share with you.
daffodils
spider lily
canna
daylily
crinum
cameilla
gardina
ginger lily
Iris
Wednesday, October 3, 2012
The Year of the Succulent: Tips for creating a succulent garden
This year my garden club is studying succulents and I though I’d look into how to better incorporate these great plants into my landscape. My soil is mostly clay even though I been amending my flowerbeds for years with compost. So I had very little success growing them in my yard. I mostly stuck to planting my succulents in pots. Here are some tips I discovered for working succulents into a landscape. I plan to hold onto these tips and maybe I’ll start a succulent rock garden in an area of my landscape in the near future.
1. Soil Succulents are not fussy about soil, providing it drains well (mine doesn't). Roots that sit in water may rot. My Autumn Joy died and was replaced several times before I started growing it in a pot. Now I have 3! Amend heavy garden soil half-and-half with decomposed granite or crushed pumice. Planting plants above mounds can further improve drainage. For containers, use "cactus mix," or add pumice or perlite to regular potting soil.
2. Water Succulents are low-water plants but they are not no-water plants. They look best when given regular water especially in the hottest part of the summer. The rule of thumb is the fleshier the plant, the less water it requires. Soil should go nearly dry before watering again. Keep succulents on the dry side during dormancy (usually the winter months). Cacti in particular cannot tolerate too much water! I lost some Hens and Chicks this summer in a pot that received too much water and had too heavy potting soil.
3. Add color to your garden Leaves and stems of succulents come in a wide variety of colors, including dark magenta, and shades of red, orange, green, yellow, tan, and even blue. Experiment and see what best suits your landscape.
4. Companion plants Plant low-water; non-succulent perennials and annuals amid your succulents for spectacular floral color in spring. Companions that work well include orange African daisies, purple statice, and California poppies.
5. Focal points A garden needs focal points to anchor compositions---such as a large and dramatic aloe, agave or columnar cactus. Focal points also might be a sculpture, a bench, a large pot, or even an interesting window in a wall.
6. Repetition When you look at a decorative object, your subconscious searches for something similar. You can lend a pleasing connection to your garden by repeating shapes, colors and textures. Containers, when all the same, also are an excellent way to add repetition.
8. Scale Choose plants that are suitably sized for the space they fill. Consider the width and height of the area when determining how far apart the plants should be. Certain cacti, aloes, yuccas and agaves can get quite large at maturity; so be sure to plan for this when choosing a location. A columnar cactus can be both a focal point and a living sculpture.
9. Height Make your garden more interesting by introducing dynamic vertical elements. Make a large Agave franzosinii the star of the show. Repeat its blue color in the ground cover and a granite boulder. Use Euphorbia tirucalli 'Sticks on Fire' in the background; Euphorbia milii 'Crown of Thorns' will add mid-height interest.
10. Mounds and clusters A natural setting for succulents is not a flat landscape and incorporate rocks and boulders. Succulents generally look best clustered. If doable, vary the terrain in your yard, then plant on mounds and ridges. This places the plants at eye level and also helps water to drain away from the roots. A valley might be a pathway leading into the garden or perhaps a dry creek bed. The varied terrain of my Georgia would have been perfect for this; it had boulders and even had a valley that would have made a great dry creek bed. The soil however was still heavy clay.
11. Containers Enhance patios, decks, balconies, entries and windowsills with potted succulents. Choose interesting, colorful and/or geometric varieties that you and your guests will enjoy up close. They can be individual plants or several grouped in a single container. Succulents in pots can also be placed in your garden permanently or seasonally if the plants need to be over wintered indoors. My “Autumn Joy” stays in pots outdoors year round. Use the same design principles (repetition, contrast, scale, height) apply to container arrangements.
12. Rocks Succulents look great with rocks: Planted in front of them, behind them, between them, or cascading over them. Add boulders with colors that match or complement the oranges, grays and blues of succulent foliage. Or choose plants that repeat or contrast with rocks already in your garden.
For topdressing that enhances the composition and reduces the amount of mud, use decomposed granite or natural-looking gravel to cover paths and bare spots..
13. Background Connect the garden to your house and whatever else is in the background---such as a pool, wall, fence, hedges or trees---by having matching (or contrasting) colors, textures or shapes. Try taking photos of your garden. When it is framed through a camera lens, certain features will jump out at you. Then use them to advantage.
14. Get rid of unnatural objects Utilitarian items in your garden that are clearly man-made can hinder the illusion of peace and natural beauty. Things to conceal or remove include black plastic nursery pots, tools, ladders, blue-green garden hoses and anything white
15. Convert one small area at a time Have a master plan for your garden before you begin, and then develop the landscape in stages. You needn't do your entire yard all at once. Look for an area that currently does not look good, or is dry--and add a vignette of succulents.
Live with and enjoy that new area for a while. Slowly convert another area or two. Try various types of succulents and observe what works well. These are very forgiving plants that will likely look good wherever you put them. Some gardeners are even making 'green roofs' using succulents; so be creative! As you fashion your own personal succulent garden, relax, have fun and enjoy the creative process!
I wish I had thought of using succulents when I first started planning my landscape! It would have been easier to make adjustments to my landscape terrain easier.( I’m thinking the hill behind my pond may be a good spot for succulents since it drains well and can be a bit dry!) But by using containers I can work succulents into my landscape until I can undertake converting an area for succulents.
Wednesday, September 12, 2012
Some Quick Gardening Tips for Fall
Now with cooler temperatures coming to the Lowcountry I can finally get back outside to do some gardening and landscaping. Here are just a few things I will be doing this fall. What is on your to do list for Fall?
Vegetables- Now is the time to clean up the summer garden. Many pests and diseases over-winter in old plant debris. Get it out of your garden and into the compost pile, as long as it is not diseased. Otherwise, have it removed from your property. I’m growing a few cool-season crops right now such a radish, spinach and lettuce. Most cool-season crops can handle cooler temperatures than you might imagine, and many taste even better after a few light frosts. If you've never had a fall vegetable garden, you're missing a real treat.
Landscape-Fall is absolutely the best time of year to plant any tree and /or shrub. The soil is still warm enough for roots to actively grow and yet the demand on foliage growth is waning. Trees and shrubs planted now have months to develop a healthy root system before the heat of next year. Be sure to keep your new plants watered. The drying winds of the cooler weather can quickly dehydrate plants. Check the soil moisture often, and water when needed. For new plantings, provide water once a week in the absence of rain.
Organic Gardening-Don't waste those fallen leaves. Dump the leaves onto the grass, and run your mower over them. This shreds them into small pieces, can be raked into beds. They break down rather quickly and are a very good way to add organic amendments planting beds. They also pull double-duty, serving as that important layer of mulch over the winter.
Flower Gardening-Plant those bulbs, in cooler climates, plant in October. In southern climates, the best time for bulb planting is November. Tulips, daffodils, crocus, iris and hyacinths are all great choices for spring color. This is also the ideal time to divide perennials and plant perennial seeds for next spring.
This will keep me busy for the next few weeks, how about you? The best part is that next spring, I will be rewarded with a garden that comes alive, looking better than ever and due in large part to the work I do this Fall.
Tuesday, August 28, 2012
Sempervivum: Hens and Chicks
I'll be giving a talk on Hens and Chicks at the first Camellia Garden Club meeting of the season early next month and thought I'd share the information on my blog this week.
Sempervivum literally means "live forever" because they grow and propagate so readily. These succulents are called by many names (semps, hens and chicks, houseleeks), but whatever you call them, they are amazing plants.
Hens and Chicks are fun and easy to grow, yet there is enough variety to keep you entertained for a lifetime. With over 3,000 named sempervivum cultivars, these succulents are available in all colors, shapes, textures and sizes. They are suitable for rock Gardens, screes, walls, banks, container gardens and alpine houses. (Scree- Loose rock debris covering a slope. A slope of loose rock debris at the base of a steep incline or cliff.)
Hens and Chicks is a common name for a group of small succulents belonging to the flowering family Crassulaceae, native to mountainous areas of Europe and Asia They grow close to the ground with leaves formed around each other in a rosette, and propagating by offsets. The "hen" is the main plant, and the "chicks" are the offspring, which start as tiny buds on the main plant and soon sprout their own roots, taking up residence close to the mother plant.
These houseleeks grow in symmetrical rosettes of fleshy leaves up to 2 ½” in diameter with a spread of 4” upwards and form hardy ground-hugging mats. They have star shaped flowers on succulent stems and although the rosettes die after flowering they are replaced by numerous offsets.
Climate and Growing Locations
Throughout the US, Extremely Cold Hardy
Hens and Chicks are hardy and can be grown throughout the USA. Sempervivum like cool nights and need a cold-dormant season to be healthy. They prefer growing zones 4-8. In colder areas it may be beneficial to move the plants into a greenhouse or cover during them during severe winter weather. Hairy cultivars also appreciate shelter from winter rain with a piece of glass or clear, hard plastic.
Sun Preferences
Full Sun to Part Sun
Sunlight brings out bright colors in Sempervivums. When planted in full shade many varieties tend to fade to a plain green color. However, in hotter weather during the summer and in the southern United States, afternoon shade can actually help plant colors last longer.
Soil Requirements
Sandy, Excellent Drainage
Good drainage is the most important requirement for Sempervivum. Plant them in sandy soil or add compost, potting soil, gravel or vermiculite to the ground to help with drainage. Hens and Chicks survive in soil where other plants can't grow. They do great with very little soil, even in gravel and cracks in rock walls; however, accumulated water will kill the plants. Ideally the soil pH level should be neutral, between 6.6 and 7.5.
Watering Needs
Low, Drought Tolerant
Immediately after transplanting, water generously. After that let the soil dry out between watering. These succulent plants are drought resistant since they store water in their leaves, but they still need water to thrive. During the summer heat they will need to be watered more frequently. Don’t over water. If you see your plants begin to struggle, make sure the soil drainage is good and cut back on the watering.
Hen & Chick Plant Propagation
Hens and Chicks produce numerous offspring, thus allowing them to "live forever". The quantity and speed at which babies are produced depends on the variety. Sempervivum can be divided anytime during the spring/summer growing season. The baby chicks can be re-planted elsewhere or left to grow around the mother hen.
These grow babies on runners. Just pull off the chicks and plant elsewhere. It is best to remove the babies when the runner has begun to wither. Offsets root quickly and contact with soil is enough for them to start growing.
Growing from the offsets preserves the characteristics of each cultivar. Seeds taken from the Sempervivum flowers generally produce plants that are untrue to type.
Sempervivum Life and Death Cycle
Once a hen plant produces a chick, that chick will begin producing its own babies after only 1 season. Sempervivum plants generally only live for 3 years, so the plants have 2 productive years before they die. After 3 years and having produced many baby plants a Sempervivum grows a tall center stalk that blooms before the plant dies. Cutting off the center stalk will not prevent the plant from dying.
It is extremely fun to grow Hens and Chicks and watch them mature and produce offsets. Their colors change drastically throughout the season due to maturity, temperatures, sunlight exposure, and other factors. Be sure to give your plants enough space to spread. Ideally they should have 4” for small plants and 6-8” for large varieties. Adequate space produces nicely formed rosettes.
Popular varieties include: Sempervivum arachnoideum (cobweb houseleek) is a hardy succulent perennial. Evergreen, vigorous and mat-forming, with numerous small green rosettes with a fine ‘cobweb’ of white hairs joining the leaf tips. Sempervivum calcareumis an attractive species with grey-green leaves with purple tips and pink flowers. Sempervivum tectorum is a very variable species, with shades of green and brown with or without contrasting tips. It grows 2-5” tall. It has rosettes that are 1” in diameter upwards and has a spread of 4” upwards. Colorful cultivars have been bred, such as “Caramel” a delicious warm caramel color, along with reds, pinks, bronzes and greys.
Sempervivum literally means "live forever" because they grow and propagate so readily. These succulents are called by many names (semps, hens and chicks, houseleeks), but whatever you call them, they are amazing plants.
Hens and Chicks are fun and easy to grow, yet there is enough variety to keep you entertained for a lifetime. With over 3,000 named sempervivum cultivars, these succulents are available in all colors, shapes, textures and sizes. They are suitable for rock Gardens, screes, walls, banks, container gardens and alpine houses. (Scree- Loose rock debris covering a slope. A slope of loose rock debris at the base of a steep incline or cliff.)
Hens and Chicks is a common name for a group of small succulents belonging to the flowering family Crassulaceae, native to mountainous areas of Europe and Asia They grow close to the ground with leaves formed around each other in a rosette, and propagating by offsets. The "hen" is the main plant, and the "chicks" are the offspring, which start as tiny buds on the main plant and soon sprout their own roots, taking up residence close to the mother plant.
These houseleeks grow in symmetrical rosettes of fleshy leaves up to 2 ½” in diameter with a spread of 4” upwards and form hardy ground-hugging mats. They have star shaped flowers on succulent stems and although the rosettes die after flowering they are replaced by numerous offsets.
Climate and Growing Locations
Throughout the US, Extremely Cold Hardy
Hens and Chicks are hardy and can be grown throughout the USA. Sempervivum like cool nights and need a cold-dormant season to be healthy. They prefer growing zones 4-8. In colder areas it may be beneficial to move the plants into a greenhouse or cover during them during severe winter weather. Hairy cultivars also appreciate shelter from winter rain with a piece of glass or clear, hard plastic.
Sun Preferences
Full Sun to Part Sun
Sunlight brings out bright colors in Sempervivums. When planted in full shade many varieties tend to fade to a plain green color. However, in hotter weather during the summer and in the southern United States, afternoon shade can actually help plant colors last longer.
Soil Requirements
Sandy, Excellent Drainage
Good drainage is the most important requirement for Sempervivum. Plant them in sandy soil or add compost, potting soil, gravel or vermiculite to the ground to help with drainage. Hens and Chicks survive in soil where other plants can't grow. They do great with very little soil, even in gravel and cracks in rock walls; however, accumulated water will kill the plants. Ideally the soil pH level should be neutral, between 6.6 and 7.5.
Watering Needs
Low, Drought Tolerant
Immediately after transplanting, water generously. After that let the soil dry out between watering. These succulent plants are drought resistant since they store water in their leaves, but they still need water to thrive. During the summer heat they will need to be watered more frequently. Don’t over water. If you see your plants begin to struggle, make sure the soil drainage is good and cut back on the watering.
Hen & Chick Plant Propagation
Hens and Chicks produce numerous offspring, thus allowing them to "live forever". The quantity and speed at which babies are produced depends on the variety. Sempervivum can be divided anytime during the spring/summer growing season. The baby chicks can be re-planted elsewhere or left to grow around the mother hen.
These grow babies on runners. Just pull off the chicks and plant elsewhere. It is best to remove the babies when the runner has begun to wither. Offsets root quickly and contact with soil is enough for them to start growing.
Growing from the offsets preserves the characteristics of each cultivar. Seeds taken from the Sempervivum flowers generally produce plants that are untrue to type.
Sempervivum Life and Death Cycle
Once a hen plant produces a chick, that chick will begin producing its own babies after only 1 season. Sempervivum plants generally only live for 3 years, so the plants have 2 productive years before they die. After 3 years and having produced many baby plants a Sempervivum grows a tall center stalk that blooms before the plant dies. Cutting off the center stalk will not prevent the plant from dying.
It is extremely fun to grow Hens and Chicks and watch them mature and produce offsets. Their colors change drastically throughout the season due to maturity, temperatures, sunlight exposure, and other factors. Be sure to give your plants enough space to spread. Ideally they should have 4” for small plants and 6-8” for large varieties. Adequate space produces nicely formed rosettes.
Popular varieties include: Sempervivum arachnoideum (cobweb houseleek) is a hardy succulent perennial. Evergreen, vigorous and mat-forming, with numerous small green rosettes with a fine ‘cobweb’ of white hairs joining the leaf tips. Sempervivum calcareumis an attractive species with grey-green leaves with purple tips and pink flowers. Sempervivum tectorum is a very variable species, with shades of green and brown with or without contrasting tips. It grows 2-5” tall. It has rosettes that are 1” in diameter upwards and has a spread of 4” upwards. Colorful cultivars have been bred, such as “Caramel” a delicious warm caramel color, along with reds, pinks, bronzes and greys.
Subscribe to:
Posts (Atom)