Wednesday, May 1, 2013

Gardening for Birds & Other Wildlife


I was surprised and happy to see an Indigo Bunting in my yard for the first time since fall migration in 2009. One reason I was so excited was because when we moved from the Atlanta, GA area I left behind a wonderful habitat for wildlife for a yard with no habitat. I traded a yard with 30+ trees and multitude of shrubs and flowers to a yard with 2 pine trees and a scrubby small oak tree.


I was used to seeing Northern Cardinals, Robins, Brown Thrashers, Eastern Towhee’s, Carolina Wrens & Chickadee’s, Eastern Bluebirds and Redheaded woodpeckers nest in my yard. I wasn’t sure how to start when the Master Gardener coordinator from Gwinnett County, GA emailed me about the NWF Backyard Habitat program. So I went to the NWF website and started implementing their 4 steps for creating a wildlife friendly garden/backyard. When I look at my yard 9 years later it is hard to believe it is the same yard.


I attribute seeing more variety of birds in my yard to the maturing of my garden. My work over the years seems to be paying off. So I thought I’d blog about gardening for wildlife again and encourage you to give it a try if you haven’t tried it yet. I've added and rework my planting areas over the years to incorporate Food, water sources, cover from predators and nesting areas. My bluebird box was immediately occupied in Feb. 2005 when first installed and has been used every year since. Carolina Chickadees and Carolina wrens have also nested in the yard. Ruby throated Humming birds, Cardinals, Brown Thrashers, Brown headed nuthatches, Red headed woodpeckers, Downy woodpeckers, Tufted Titmouse visit my feeders and bring their babies to feed and bathe in our garden.


It's not hard to get started at all. One of the easiest things to do is just add a bird bath. This can be especially important in dry months or droughts. Here are some ideas for getting started in your own yard.


FOOD: I relied heavily on bird feeders early on and still use them to feed birds when natural food in not available and as a supplement. But I have added Native forbs*, plants, shrubs and trees provide the foliage, nectar, pollen, berries, seeds and nuts many wildlife species require to survive.Blueberries are a favorite food for the Mocking birds who visit our yard.


WATER: All wildlife needs a clean source of water for drinking and bathing and reproduction. Since I don’t have a natural lake, river, pond, ocean, stream or wetland in my backyard I use man made water sources. The easiest way of course is to use a bird bath. I have several in my yard set a different heights including one at ground level. One is a small fountain with recirculating water that small birds love. The ground level is a favorite with some of my shyer and larger visitors. We even see occasional opossums visit our 250 gallon pond with waterfall. One pool of the waterfall is shallow with flat rocks and birds will bathe and drink from it as well. The sound of that pond can attract the wildlife as well. I have recently created a small rain garden I’m hoping to create a puddling area for butterflies.


COVER: I didn't have a lot of cover when we first moved to this house. I had to wait for trees and shrubs to grow up. After 9 years they are producing a fair amount of cover and shade that was missing from my landscape. Wildlife need places to feel safe from people, predators, and inclement weather. Behind my back fence is a small wooded buffer area that provides some cover now and early on. Thickets and brush piles offer great cover with bushy leaves and thorns. I started and keep a brush pile that can be used by birds and other wildlife. Our pond is home to several frogs and we have a toad abode as well. The rock of the waterfall is home to several skinks and anoles.


PLACE TO RAISE YOUNG: Wildlife need places to reproduce, bear and raise their young, and see their young survive to adulthood, all safe from predators, bad weather and human interference. Forming a wildlife habitat creates a place for the complete life-cycle of a species to occur, from tadpole to frog, from caterpillar to butterfly. Many of the cover features in your habitat can also serve as a place for raising young. Consider a wildflower patch for butterflies to lay eggs, constructed birdhouses for nesting birds, ponds for amphibians and fish are places for raising young.


I'm also adding a host plant garden for butterflies to complement what I've been doing for the birds and other wildlife that visit our yard. I'll talk more about that in a later blog.


May is Garden for Wildlife Month and it is a great time to make your yard friendlier to wildlife. It doesn't matter if you’re a first time gardener with only a small space on your patio for containers or if you are an expert gardener with acres to plant. If you take the challenge and turn your yard, garden or outdoor spaces into a habitat for wildlife consider becoming a certified wildlife Habitat with National Wildlife Federation.

*Forb: A broad-leaved herb other than a grass, especially one growing in a field, prairie, or meadow


Friday, April 19, 2013

Top-dressing the lawn


It’s only been 2 ½ months since we top-dressed our front lawn with compost but we are already seeing good results! So I thought I’d go into a little more detail. Top-dressing is an old concept that had fallen by the wayside when the need for instant gratification and convenience triumphed over the old art of manually spreading compost on the lawn. However with new attention to organic lawn care and a desire to reduce the use of chemicals top-dressings is coming back into favor with homeowners.


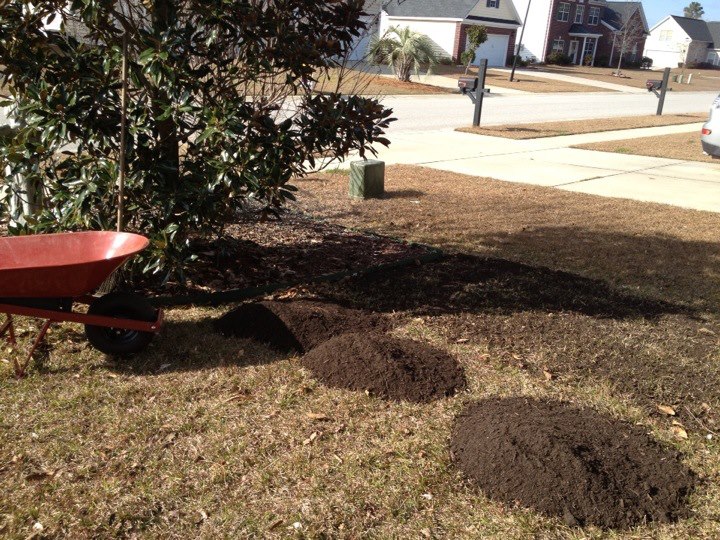
Topdressing a lawn is the process of adding a thin layer of organic material over the lawn. Typically 1/4 inch - 1/2 inch of compost is spread across the lawn with shovels, in a throwing action. The material can be worked into the thatch area by raking, washed in with rain or sprinklers, or allowed to settle on its own. It is labor intensive and may be a reason for its lack of popularity. Lawn care companies sometimes offer a topdressing service but it is often viewed as an inconvenience because of the materials and labor involved. But as organic lawn care gains popularity, topdressing the lawn on a regular basis may become more popular and more services may offer the service.


Topdressing's benefits are numerous and it's hard to understand why it is not the basis for every lawn care program.
• topdressing can improve soil biology by adding organic matter and the beneficial microorganisms of compost. Soil structure and drainage can be modified by topdressing.
• Topdressing reduces lawn stresses, helps keep thatch under control and acts as a long term natural fertilizer. Adding organic matter to a lawn by topdressing with compost is the most beneficial cultural practice lawn care has to offer.


Topdressing materials vary greatly and are usually dictated by budget and need. Most topdressing is performed with compost, which can vary in quality and get expensive. Compost should be made from the appropriate ratios or wet and dry materials and should be fully "cooked". High quality finished compost should be dark and rich and made with a variety of organic material with few fillers like sawdust or loam.


When topdressing, it is beneficial to do it in combination with other cultural practices like aerating, de-thatching and over seeding. Topdressing after aerating and over seeding (as needed) is the ideal trio of lawn care chores that will result in a healthier lawn. The aerating opens up the soil, allowing for better air and water movement and reduced compaction. The aeration holes provide the perfect seed bed for over seeding, allowing newer generations of grass to establish and thrive. Lastly, topdressing with compost, helps fill in the holes, covering the seed and allowing for ideal germination conditions with a burst of nutrients as the seedlings establish. It's a win, win, win, situation.


I haven’t reseeded my front lawn. Once this application of compost has fully worked the yard is and actively growing I am planning to aerate, then plan to topdress again.

Friday, April 12, 2013

Spring Gardening


It has been a busy spring for me at work and my gardening is way behind of my schedule and because of the odd see-saw weather. Warm then near freezing weather really confused the plants and made it hard to plant my greenhouse plants.


Finally my days off matched up with some nice weather and I was able to put together 2 days of yard work and make some progress in the garden! The late start means I will not have much of a vegetable garden but was able to plant some tomatoes,peppers, squash and herbs. I also have some strawberries plants from last year that I transplanted earlier.


My main concern was getting plants out of the greenhouse where some plants were baking.burning int 100+ degree temperatures in the afternoons.Even with a shade cloth I can't keep the temperatures at an acceptable level.


Most plants are out of the greenhouse now, just a few remain and I plan to move them out as soon as possible.


My front yard has really responded to the compost we put down in the fall! I think my neighbors will be jealous. We have few weeds and the grass is coming up green!


Wednesday, March 6, 2013

Flower Shows


I know it has been a while since I posed anything I blame the weather, work, our puppy’s medical needs and the flower show.


I was invited to help with Flower shows a couple of years ago. As a Master Gardener I was asked to help people identify and classify the horticulture they were entered in the show. It turned out to be very educational because even though I know many of the common names for plants and flowers I didn't know most of the scientific names and as I helped people with their entries I learned a lot of scientific names for plants and flowers.
Eventually I was persuaded to enter some flowers and foliage of my own. First time was at the Coastal Carolina Fair held the end of October and first part of November every year. Didn't win any awards but it was still educational. My second try was at the Breath of Spring Flower show held in March at Cypress Gardens last year. I actually won some awards this time but no ribbons.


Part of my problem with the flower shows is that my garden doesn't cooperate! I have very little in bloom when both shows are held. This year I had the same problem. I did manage to find 3 daffodils; some cut foliage, and discovered I had a Dutch Iris, and several Cyclamen flowers but still not much to enter. So for the first time I entered several potted plants. My Arrowroot vine and Purple Velvet plant won First Awards, my Red-veined Prayer plant won a Second Award and my ‘Red Scarlet’ Cyclamen won a first award but also the Show Chairman Award/Ribbon for most popular entry in horticulture. (All of my other entries received a First, Second or Third Award this year as well.) I will tell you this was a big surprise as I almost didn't enter it because the pot was not the best.
There is also an education component to the garden show. There was a display on Xeriscaping, Backyard Habitat, and growing Succulents (I helped a little with that one).


The Breath of Spring Flower Show is award winning and sponsored by 4 Garden Clubs: Belle Isle Garden Club, Camellia Garden Club of Greater Charleston, The Garden Club of Otranto, Town and Village Garden Club. It is also a member of National Garden Clubs, Inc, South Atlantic Region and The Garden Club of South Carolina, East Lowcountry District.
This year the Breath of Spring Flower Show theme was “Yesterday, Today and Tomorrow”. It was a beautiful show and even had local television coverage.


If you love flowers and have never been to a show consider attending one and even take a chance and enter one. You may be surprised how well you will do.


I haven’t ventured into design yet but might consider it after I get more instruction in that area. After all I've only been a member of Camellia Garden Club of Greater Charleston for a little over a year!


The purpose of National Garden Clubs, Inc. provides education, resources and national networking opportunities for its members, to promote the love of gardening, floral design, civic, and environmental responsibility.


Tuesday, February 12, 2013

Re-grow Romaine lettuce Hearts

I saw this on a The Grumpy Gardener (I think) and decided to try it.


Just save the end from your lettuce and put into a little water (about a half inch). Change out the water every day. The lettuce will grow back incredibly quick too.


The best and most amazing thing about lettuce, besides eating it, is that if the stump is intact it will regenerate and regrow new shoots for a second harvest. I took three photos romaine “stumps” in various levels of regrowth in my herb garden. All I did was put each stump in a half inch of water, check the level daily, and wait for tender new growth. I've also planted the stump right in the ground and had success as well when the weather is cool.


The perfect environment for re-growing leafy greens is a cool and bright window with all day light. Give it a try the next time you have a head of lettuce with the stem still intact. You have nothing to lose and a free harvest of lettuce to gain.


Important Tip: Romaine Lettuce is one type of produce that is easy to find in the organic form. It is often packaged as three heart of romaine and it pays to spend just a dollar or two more and have your salad free from any unnecessary pesticides.


I understand it works with celery as well.

Tuesday, January 29, 2013

My Lawn Isn't Thriving


The first few year we lived in our Charleston, SC house both my backyard and front yard both did pretty well. Since Centipede grass doesn't like to be fussed over I just check the PH every couple of years and applied 15-0-15 lightly as suggested by my soil report from Clemson Extension. Then about 3 years ago the front yard began to thin and just didn't recover from winter as quickly as before.


I know from planting trees when we first moved into our home that the front yard was mostly clay. I've amended my flowerbeds over the years and the plant there do rather well. I wondered what I could do without digging up the lawn and starting over. I asked several Master Gardeners and Extension Agents for some ideas and came up with a plan.


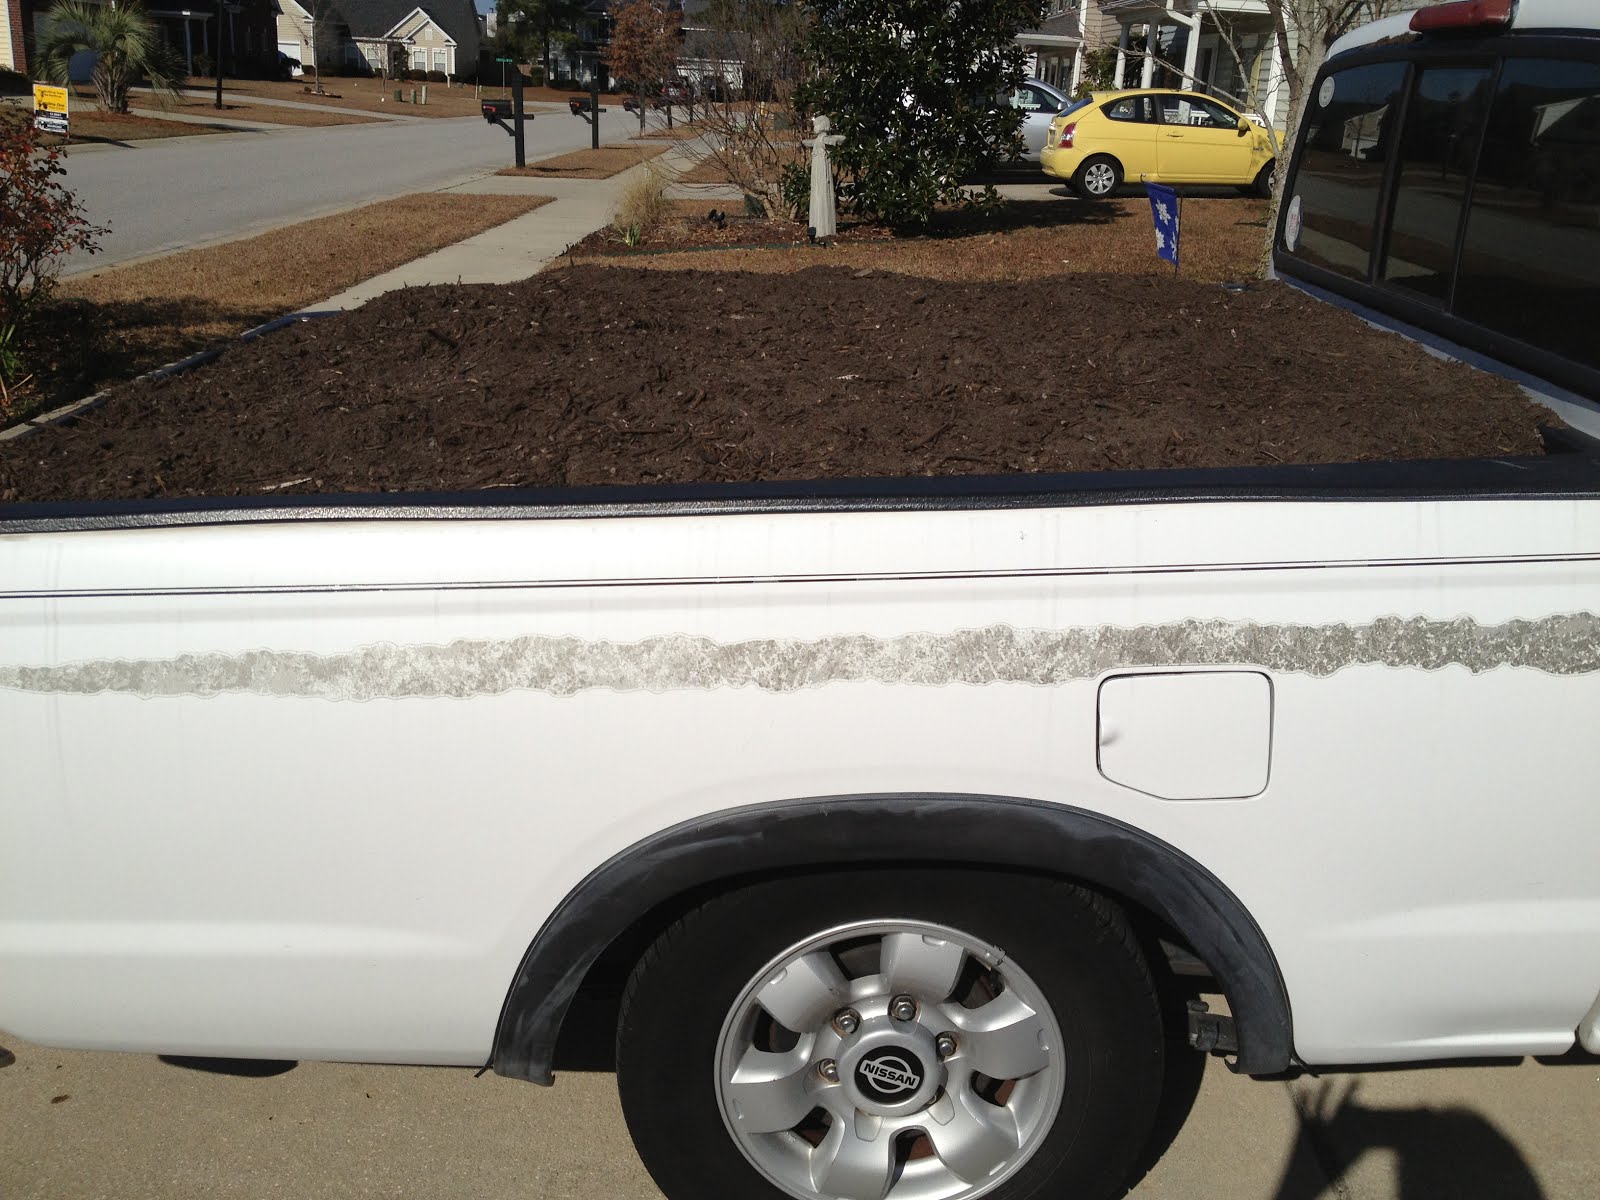
While my warm-season lawn was dormant I spread a light layer of compost over the yard. This was purchased at a local landfill that also runs a compost facility for $10 a ton. Our truck couldn't quite hold a full ton so it cost us only $7 and we were able to coat the front lawn with a little leftover for my other garden projects.


I've been watering the compost it in on warm days this winter and hope to see my yard respond with healthier turf. When the grass is fully out of dormancy which is usually around the end of May we plan to aerate the lawn and add more compost. It may take a little time but I'm assured that this will help my Centipede lawn. Check back with me in a few months for an update and we'll see how it works out!


This should work for other types of grass as well. Just remember not to bury your turf too deep in the compost. A thin layer will work best.

Wednesday, January 16, 2013

Stinkhorns Fungus

Have you ever walked outside in your yard and said “Pee-yew”? What is that smell? Well I have, and this winter has been a very smelly! During the cooler weather of winter and early spring you may notice foul-smelling mushrooms popping up in your yard like I have. The odor from stinkhorns ( Clathrus columnatus) with it’s weird orange fruiting body is so strong it may make some people gag. Although the smell is extremely unappealing these fungi; known as stinkhorns, are not really bad for your landscape and can be beneficial.


Stinkhorns fungi start out as white, egg-like structures in mulch or other damp decomposing material. Most of this fungal structure is found underground. When enough water is available, the egg-sac structure will rupture and the mature mushroom will emerge. Stinkhorns are in the same order of fungi that includes puffballs and earthstars. Depending on the type of stinkhorn the mushroom can be stalk-like, globular, or latticed and very in color usually pink or orange in this area.
All Stinkhorns produce foul order as the name implies. Sometimes described as a putrid, rotting meat smell, this smell attracts ants and flies that pick up and carry the mushroom spores to other places. The good news is they will not harm plants or grasses in your landscape. In fact stinkhorns break down organic matter and can be beneficial to sandy, clay and nutrient poor soil. By breaking down materials like mulch the nutrients become available for plants.


As for management, take heart that these mushrooms are seasonal and stinkhorns also shrivels and disappear quickly. They will normally appear for just a few weeks once or twice a year especially during wet, cool weather. Stinkhorns do occur naturally in the landscape but can also be introduce through mulch materials. If you can’t abide the stinkhorns even with their beneficial attributes there are a few steps you can take to deal with them in your own yard:
• Remove decaying organic matter, especially around dead roots, underground stumps and hardwood chip piles
• Think about using vegetative ground covers instead of mulch and/or keep large mulched areas away from your house
• Dig or hand pick stinkhorns in the ‘egg’ stage put it in a zip lock bag and throw away
• Best suggestion is to tolerate them. Remember they are a benefit to your soil. Close your windows to keep smell out of the house and try holding your breath while walking by the stinkhorn.
There is no registered safe chemical control for use on stinkhorn fungus. Using chemicals is not recommended.

I've had all of the types in my yard in the past but this year mine have all been octopus stinkhorns.


Friday, January 11, 2013

How to Care for Christmas Flowers Year-round Part 3


Christmas Cactus: There are several plant species that are called Christmas cacti, but the true Christmas cactus is the plant, Schlumbergera x buckleyi, a hybrid of some very similar holiday cacti, and is a very common plant in cultivation. These are relatively easy plants to take care of, safe (no spines or toxins) and can live a long time (generations). I have a cutting of one that originally belonged to my husbands grandfather that was very old and very large. I also have the closely related plants Thanksgiving Cactus (due to the timing of the plant’s affinity to bloom around Thanksgiving), and Easter cacti. These plants are nearly identical to Christmas cacti but tend to either have sharper node tips, or much blunter node tips and bloom at different times of the year.

Schlumbergeras are epiphytes in nature (grow on other plants or non-soil surfaces), from the high elevation jungles of Brazil. Their natural environment is a relatively cool even temperature, high humidity, bright light with little direct sunlight, and frequent rain.Considering this it is a little amazing how well they thrive as potted plants in normal cactus soil and in a warm temperate climate, or indoors.Though these are indeed true cacti, they do not look like the cacti most are normally used to seeing. These plants are fleshy, green, segmented plants that, over time, develop woody, thick stems. Thankfully they are basically spineless.

Care:

It's no surprise that, Christmas cacti require different care than do most cacti. Even though they come from tropics, they live in a relatively cool environment and therefore do NOT like high heat like desert cacti do. Basically all cacti are summer growers and spend winter very inactive in terms of growing or flowering. This is true of Christmas cacti as well. Despite their blooming in winter, they do very little growing in winter, but it is still the best time of year to enjoy Christmas cacti. They don’t like temps much over 80 degrees anyway. On the other hand they cannot tolerate freezes either, and prefer temps above 55 degrees. Outdoor plants seem to cope with temps into the low 30's but are not happy about them. Leaves change color due to cold. So if you keep them outdoors and cold weather is coming, bring them in.


And unlike most cacti, Schlumbergeras do not like full sun, particularly when it’s hot. But they do like bright light and grow and flower best if the light is very bright. They will tolerate low light situations for short periods of time, and that is why they do so well as indoor plants. A few days in the middle of the table far from windows will not do them much harm. But they do need to be returned to an area of bright light soon after, or blooming might cease early. My cacti do best when kept outdoors under a shady tree or porch when it’s warm and I move them back indoors near a bright window as it gets colder around 55 degrees. In warmer climates these can be kept outdoors year round, but still don’t try to grow them in the garden like one would a regular cactus. Freezes will damage them, but it takes a pretty severe freeze to kill one in a warm climate.

Schlumbergeras need to be planted in well draining soil. Remember in the wild they basically live in soil-less situations, so water needs to drain past the roots easily, or they could rot. Under-watering will kill a Christmas Cactus, too, but a lot more slowly. There is time to intervene should the cladodes appear flattened and wrinkled. Schlumbergeras are from high rainfall and high humidity environments and do appreciate being watered regularly. My plants seem to do well in soil formulated for cactus.

Once the days shorten (usually in October), back off on watering. Some recommend NO water the entire month of October, and then resume again in November. Then it is recommended to withhold water again once blooming is over for a bit longer than a month this time. If signs of new growth appear, it’s time to start watering again. This is also a good time to re-pot the plant and put it in some new, clean, well draining soil. Re-potting is recommended every few years.

Fertilization should be with half strength water soluble formulas and only in warmer weather. Wait until new growth is seen and time for re-potting. If using a granular fertilizer, it is best to be stingy- these plants do tolerate fertilizers better than do most cacti, but still, be careful. 10-10-10 is the best ratio to use.


For plants that are not flowering as expected:
Be sure the soil is not too dry, or plants are not next to a cold or hot source (air conditioner, heater etc.). If there is some night light on the plant, it might retard it from blooming. Put these plants in a totally dark room for a minimum of 13 hours a night. This will also help these plants bloom when wanted, and not too early. These plants may need longer light to simulate early fall, rather than late fall, to keep them from blooming too early. Then do the total darkness thing about 4-6 weeks before the time blooming is desired, every night until buds form and the plants can be returned to their location near the window or table. And be sure the daytime temps are in the 60's (hot houses will prevent these from blooming) and night temps are not much below 50 degrees. Sometimes a little liquid fertilizer with extra potassium can help stimulate blooming. Once flowering starts, it is recommended not to move these plants too much, in terms of overall heat and light, or they may abruptly stop blooming and drop all their buds.